Git 客户端安装
讲真,这个对大家应该都没有难度。。。提供下载地址,自己玩
Mac 安装
Windows安装
Git For Windows 提供命令行 Git Bash 和图形化 Git GUI
玩转本地仓库
基础操作
创建版本库
|
|
android-pay-git-test 目录下多了一个 .git 目录,意味着该目录已经成为可以通过Git管理的Repository。
Tips: .git 目录不要乱动~切记。。。
提交代码
|
|
Tips:
- git commit -m “description”
- git add . 可以add所有修改文件
查看状态及修改内容
|
|
Tips:
多使用 git status 命令查看当前状态
查看日志
|
|
|
|
|
|
后悔药-撤销修改及版本回退
场景一: 仅修改了工作区,直接丢弃工作区的修改。
1$ git checkout -- <file>场景二: 修改已经提交到暂存区
12$ git reset HEAD <file>$ git checkout -- <file>场景三: 修改已经 commit
1$ git reset --hard <版本>
Tips :
- HEAD 表示当前版本,上一个版本为HEAD^,上上个版本 HEAD^^,之前的第100个版本 HEAD~100
- 每一次 commit 都会生成一个唯一SHA1值,我们称之为 commit id,可以根据该 id 准确的定位到某一版本。
删除文件
|
|
执行 rm 命令后,文件在工作区删除,我们可以使用 checkout 找回或者 commit提交删除。
分支操作
创建分支
|
|
查看分支列表
|
|
删除分支
|
|
分支合并
|
|
查看分支合并日志
|
|
分支冲突
冲突的原因:不同的分支修改同一位置的代码
删除多余内容,保留所需内容,提交即可。
分支操作流程
初始状态:HEAD 执行 master
创建分支:创建dev指针,指向 master 相同的 commit
切换分支:HEAD 指向 dev
修改分支:dev 指向最新的 commit,master指向不变,HEAD 跟随 dev
切换至master:HEAD 指向 master 的 commit
合并dev分支:master 指向 dev 最新的commit,HEAD 跟随 master
分支合并模式
- Fast-forward: “快进模式”,直接将 master 指向 dev 最新的 commit。Git默认采用这种模式,合并速度快,删除分支后,会丢失分支信息。
fast-forward 合并分支
合并日志
- –no-ff模式:不使用快进模式,该模式在merge时生成一个新的commit,需要 -m 描述信息,git log 命令可以查看分支历史提交信息
–no-ff 合并分支
合并日志
临时存储
场景:开发过程中,我们需要切换到另一分支,当前分支的修改不能或不想提交,又不能丢弃。。。怎么玩?
|
|
远程仓库
远程仓库配置
SSH 设置
Git 本地仓库和远程仓库之前数据传输使用ssh协议。
SSH key 生成
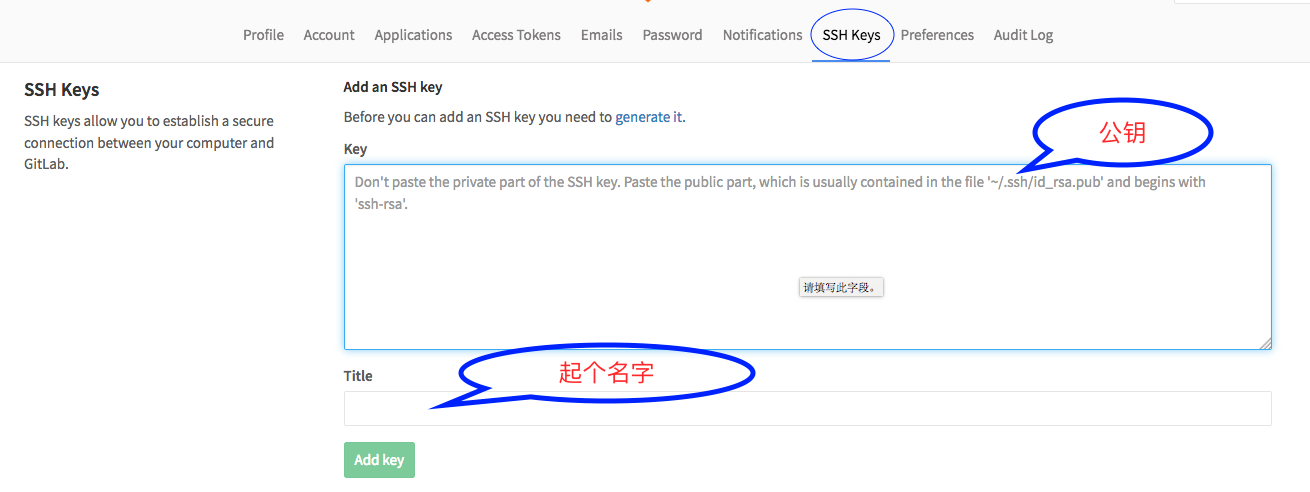
12345$ ssh-keygen -t rsa -C "youremail@example.com"...可以起个文件名...$ cat ~/.ssh/<ssh file name>.pub // 复制公钥,远程仓库设置Gitlab 设置 SSH Key
验证链接是否成功
12$ ssh -T git@github.comHi LeoPoldCrossing! You've successfully authenticated, but GitHub does not provide shell access.
多SSH管理
多个Git平台账号共存,比如 Github 和 Gitlab ,如何处理?
生成对应平台的 SSH key
添加ssh私钥
12$ ssh-add ~/.ssh/id_rsa_github$ ssh-add ~/.ssh/id_rsa_gitlab创建修改config文件
123456789101112# gitlabHost gitlab.jinhui365.cnHostName gitlab.jinhui365.cnPreferredAuthentications publickeyIdentityFile ~/.ssh/id_rsa_gitlabUser gitlab username# githubHost github.comHostName github.comPreferredAuthentications publickeyIdentityFile ~/.ssh/id_rsa_githubUser github username
用户名和邮箱配置
全局配置
12git config --global user.name "yourname"git config --global user.email "youremail"局部配置
12git config user.name "yourname"git config user.email "youremail"重置
12git config --global --unset user.name "yourname"git config --global --unset user.email "youremail"
远程操作
创建仓库
这个很简单,就不演示了~ Github 或者 Gitlab 上找 New Reposity。得到类似下面的地址
关联仓库
|
|
查看仓库信息
|
|
推送分支
|
|
比较差异
|
|
拉取代码
克隆仓库
1$ git clone <仓库地址>拉取代码
1$ git pull <repository> <branch name>
关联分支
|
|
分支关联后,git pull 或者 push 直接使用。。。
标签管理
创建标签
默认标签,打在HEAD
1$ git tag <tag name>指定commit
1$ git tag <tag name> <commit id>创建说明标签
1$ git tag -a <tag name> "description" <commit id>
查看标签
查看列表
1$ git tag查看标签信息
1$ git show <tag name>
Push 标签
|
|
删除标签
本地删除
1$ git tag -d <tag name>远程删除
12$ git tag -d <tag name>$ git push origin :refs/tags/<tag name>
拉取TAG代码
不可编辑
1$ git checkout <tag name>可编辑:从TAG checkout 一个分支
1$ git checkout -b <branch name> <tag name>